

Following on from the tale of my transformation of my dresser from yesterday, you might remember I mentioned that I put aside the big old chunky draw from the bottom.
Well today I’m going to show you how I made a super cute blanket box from it (which has since become a cat nap box instead!)
I must apologise firstly for the lack of photos in this one, I’ve only got the finished project ones so I’m going to have to try being super clear with my directions!
Ok so I started with the feet. I had been looking at buying some but didn’t really want to buy them brand new. I wanted some short and stumpy legs (just like mine!) rather than tall table ones and they were surprisingly difficult to find as well as pretty expensive. I’d been saving empty ribbon reels for a while in the vain hope I’d find a good use for them, along with some small flower pots I had lying around. I realised that by creating a little tower of upside down plant pot, topped with a couple of reels I had the perfect stumpy leg! I glued four of these together with industrial glue and then spray painted them a cream colour. A little unorthodox but the result was 4 really awesome legs made from junk!
I put these aside and got working on the padded lid. I had some old ply lying around so cut it to the size of the the box to make a lid. I then went to the store to get some fabric. I chose some lovely spotty green material which looks perfect. I wanted the lid to be quite plush so I needed lots of padding. I was just planning on buying some wadding but then I had an idea…. I had some old pillows at home going spare that were waiting for a project!
So I ditched the padding and bought some biscuits instead…
Once home I aligned two pillows side by side down the length of my ply. Then covered with the fabric I bought earlier. I wanted to tuft the fabric (create buttoned pockets in the fabric) before I attached it all together.
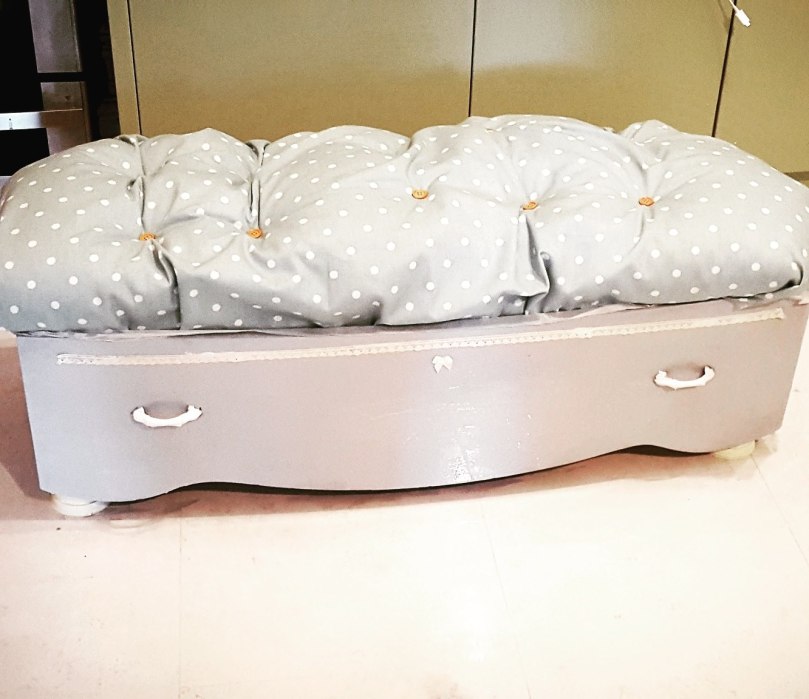
As I’ve mentioned my needle skills are poor so I approached this with intrepidation but actually found it bearable in the end. I sewed through the fabric, into the pillows underneath and then back up through the fabric, repeated around 10 times for each puck and pulled tight before securing with a knot. I then added a button to the centre of the dent. I created all my tufts then after tucking the fabric round the ply and attaching it underneath, I stapled it all the way along the the ply on the underside of the lid.

This gave me my finished lid. Ok so here’s the confession..one of my dents isn’t really a dent and looks a bit silly. I think the stitching hasn’t held or something…It looks authentic..
Next up I prepared the draw. I sanded the whole thing before giving it a coat of prime and leaving to dry. (I used the same primer as I did for the dresser) I then gave two coats of paint (same paint as dresser). Once dry, I attached two hinges to the lip of the back of the draw and screwed on my lid from earlier.
I then applied industrial strength glue to the tops of the legs and attached them to all four corners. Finally I finished the front of the draw with a little lace and bow and there we have it.
I learnt a lot from this project, namely about my sewing ability! However just how thrifty you can be. It would have been so easy to spend £40 on legs and padding but actually I had a solution right here at home waiting to be used! Sometimes its just about looking outside of the box…literally!
Have a lovely Sunday everyone, I start a brand new career tomorrow, so will be spending the rest of the day feeling the nerves 😦
xx

Wonderful! My fur Family would try to take over that spot for sure! Good luck on the start of a new career tomorrow! 🙂
LikeLike
Yep, its become a furm(!) favorite! Thank you very much x
LikeLiked by 1 person
Love this! And love the legs too. Good luck tomorrow!
LikeLike
Thank you! Who doesn’t love a stumpy leg! And thank you for the good wishes, I think I’ll need it x
LikeLike
Love your recycling ideas
LikeLike
Thank you!x
LikeLike
LUV this idea and how you used “junk” to make something useful! Way to think outside the drawer-box 🙂 ♥ ❤
LikeLike
Thank you so much! That’s my aim! Love your blog xx
LikeLiked by 1 person
Thanks!
Oh, and I’ve also shared your bucket DIY post on my blog’s fb page, if you’d like to visit… gotta ❤ that pillowy pouffe idea! 🙂 ♥ ❤
LikeLike